
When you set up a brooder for the first time, you need to decide on how to heat it. Heat lamps have been the standard for decades. Heat plates are a newer option, gaining significant ground among backyard keepers in recent years.
How Heat Lamps Work
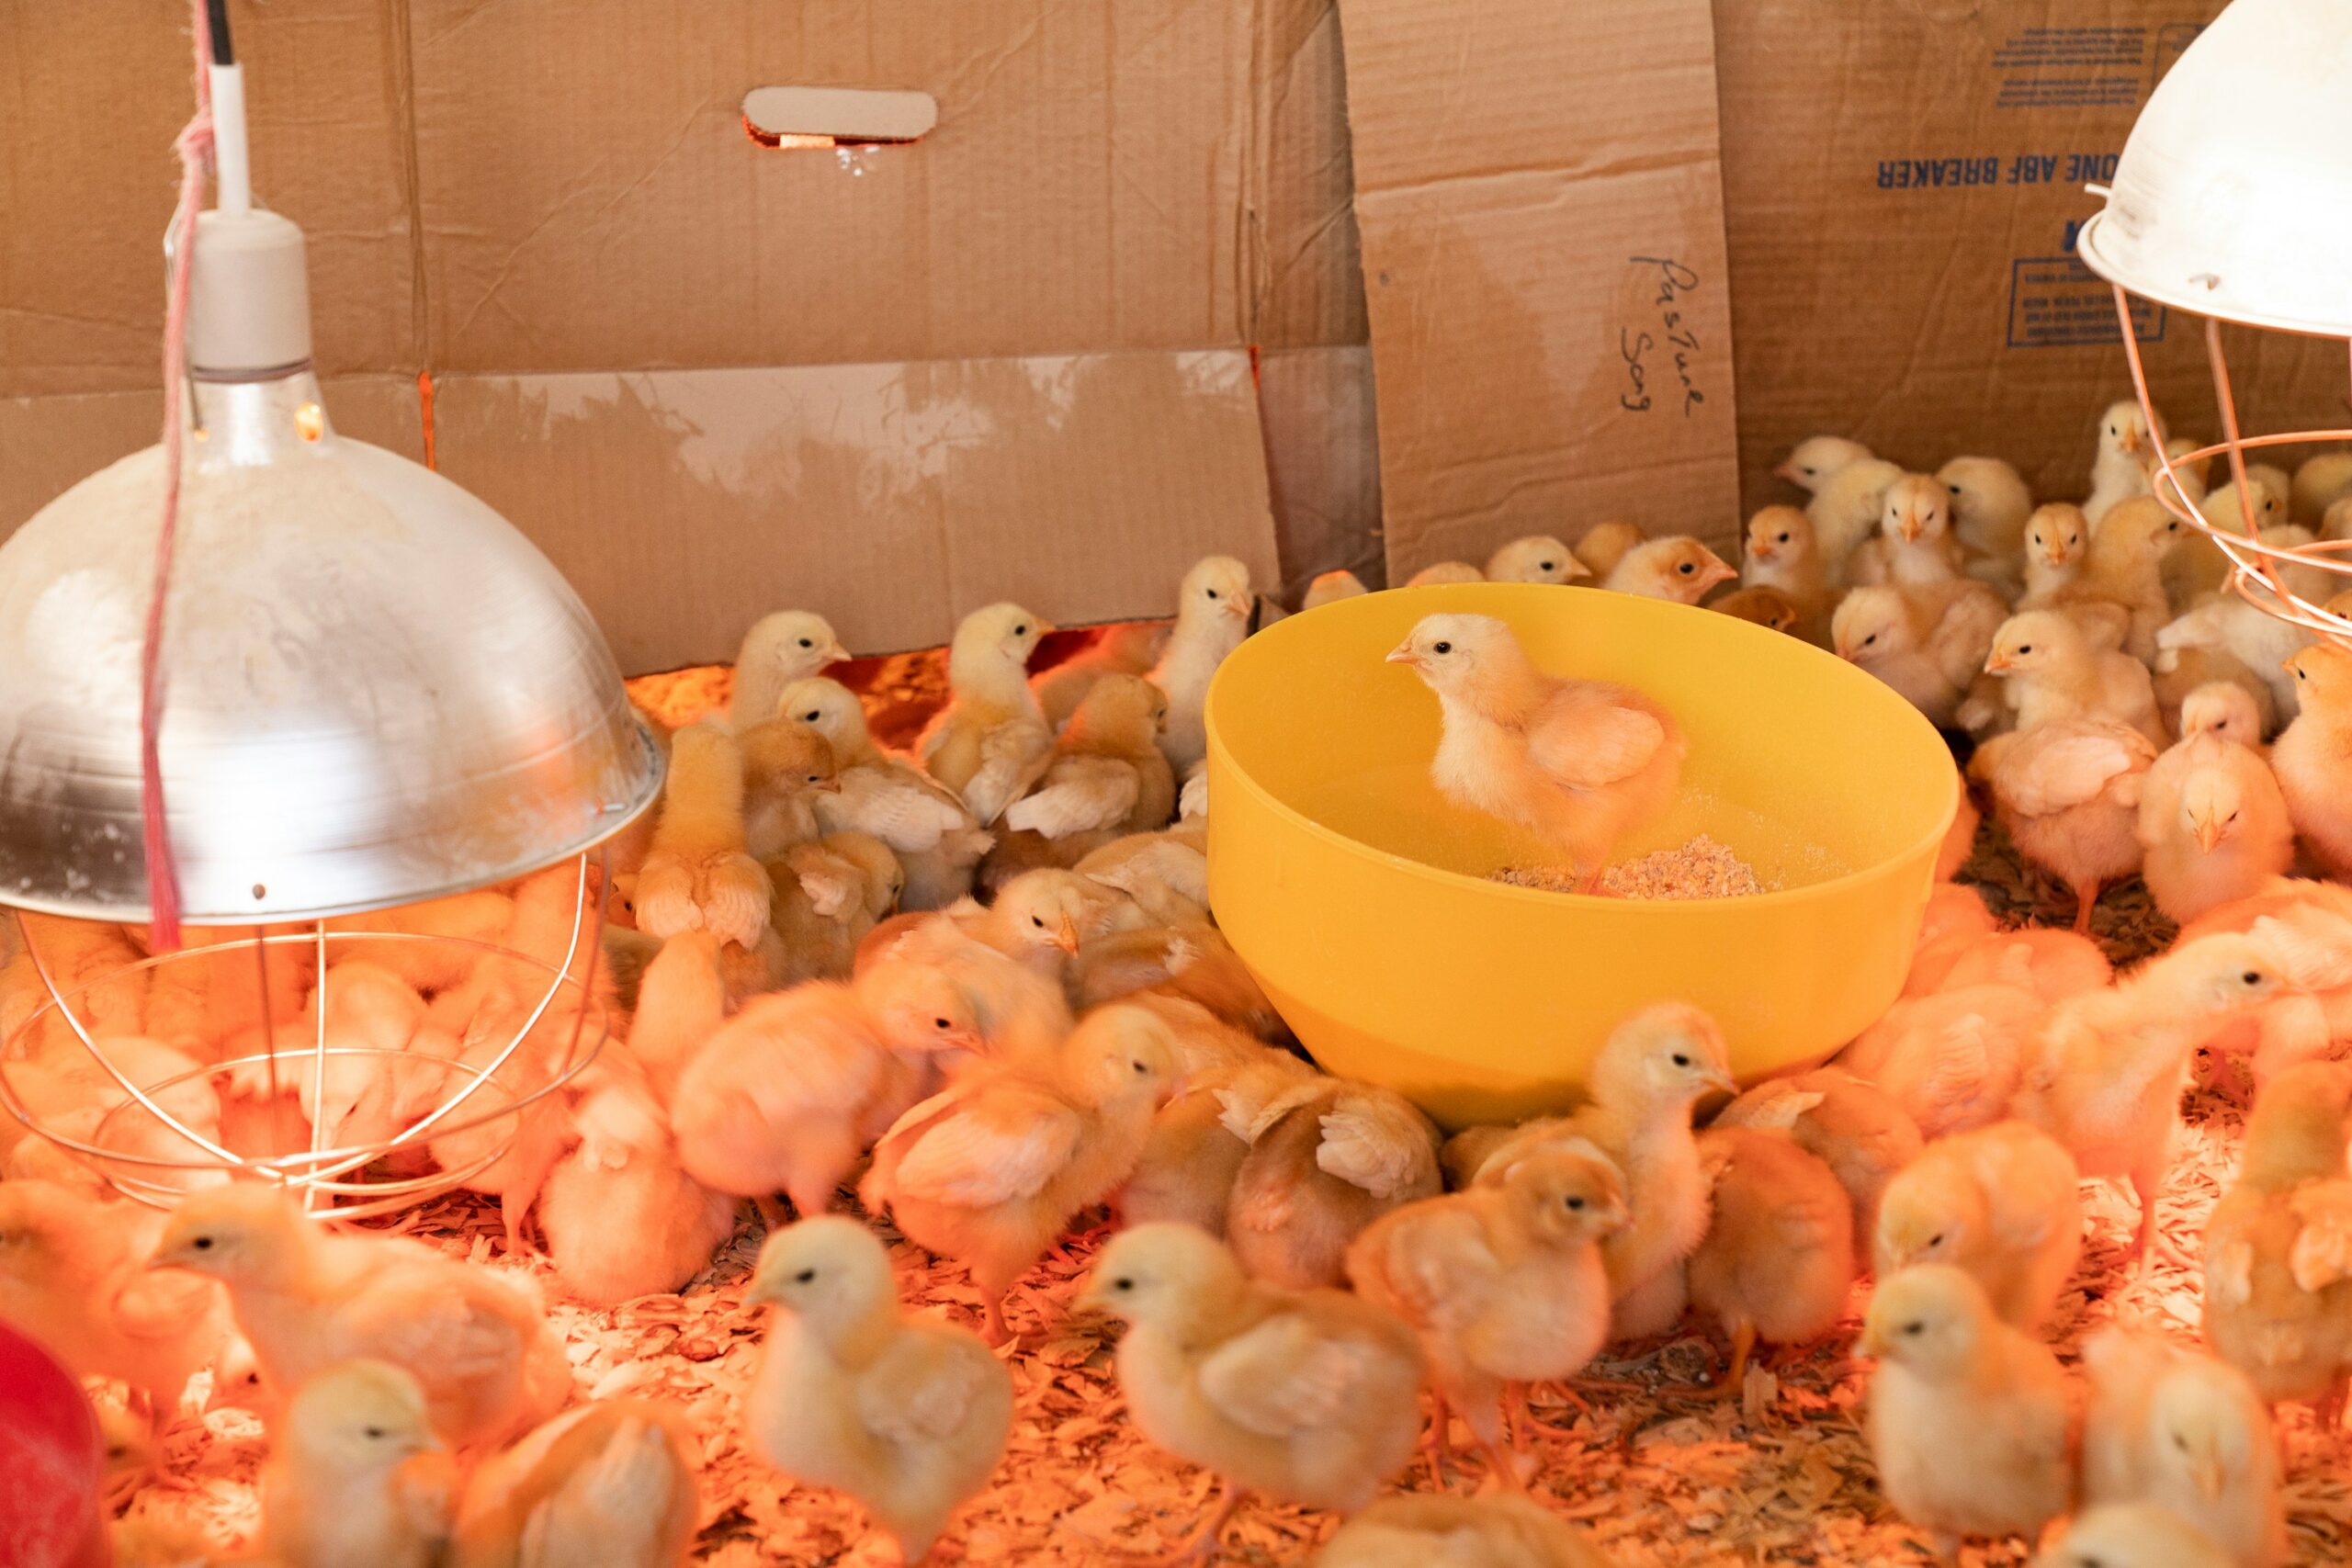
A heat lamp is a reflector fixture with a high-wattage infrared bulb, typically 250 watts, suspended above the brooder floor. The bulb heats the air and bedding below it by radiating infrared energy downward. The height of the lamp above the floor determines the temperature at ground level. Lower the lamp to increase heat, raise it to reduce it.
Heat lamps have been the default brooder heating method for generations of chicken keepers. They are inexpensive, widely available, and simple to set up.
What heat lamps do well:
- Low upfront cost. A lamp fixture and a pair of bulbs runs $20 to $35.
- Suitable for large brooder setups and bigger flocks. One 250W lamp can heat a brooder for 20 to 30 chicks depending on ambient temperature.
- Easy to find. Available at Tractor Supply, farm supply stores, and online.
- Flexible. Works in any brooder configuration: cardboard box, stock tank, wooden brooder box, or custom builds.
What heat lamps do not do well:
- Fire risk is real. A heat lamp running at 250 watts generates significant heat. If it falls, tips, or comes into contact with bedding, it can start a fire. Brooder fires caused by fallen heat lamps are a known cause of chick losses and barn fires.
- Temperature fluctuation. Air temperature around a heat lamp varies depending on drafts, ambient temperature changes, and how well the brooder is enclosed. Maintaining consistent temperature requires monitoring.
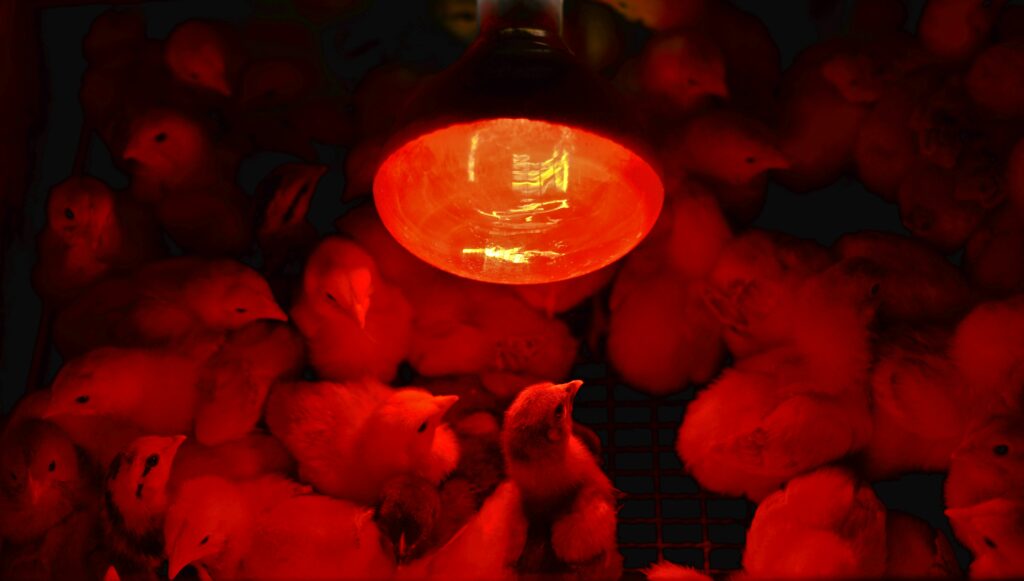
- Light disruption. Standard red heat bulbs emit visible light 24 hours a day. Constant light exposure can disrupt chick development and cause behavioral issues like feather-picking in some flocks. Ceramic heat emitters solve the light problem but require a compatible fixture.
- Energy consumption. A 250W bulb running continuously for six weeks uses significant electricity.
Recommended heat lamp setup:
Little Giant Brooder Reflector Lamp, 10.5 inch, 250W max, with bulb guard
LUCKY HERP 250W Infrared Red Heat Lamp Bulbs for Chicks, 2-Pack
The Little Giant fixture is one of the most established brooder lamps in the category, widely used in farm supply circles, includes a wire bulb guard, and uses a ceramic socket rated for the heat output. The LUCKY HERP bulbs are a well-reviewed 250W option specifically marketed for chick brooders with consistent buyer feedback on heat output and bulb life.
How Heat Plates Work
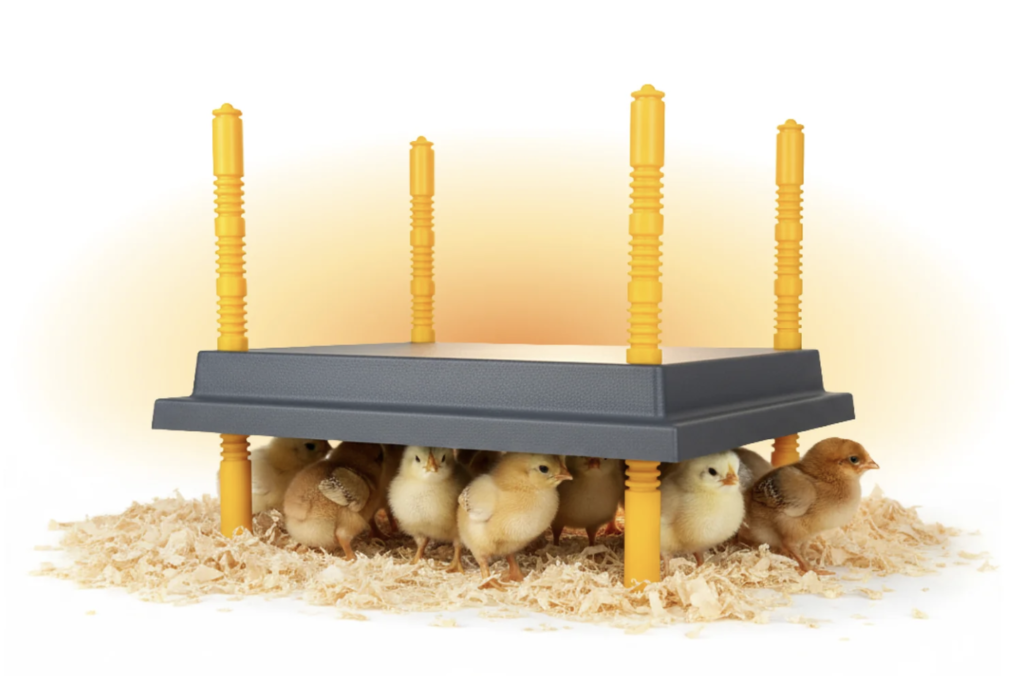
A heat plate is a low-profile panel heater that chicks can walk under. The plate surface maintains a consistent temperature and chicks self-regulate by moving in and out of contact with it as needed, similar to how they would huddle under a broody hen in nature.
Heat plates have become increasingly popular as a safer, more energy-efficient alternative to heat lamps. Most quality heat plates are adjustable in height to accommodate chicks as they grow.
What heat plates do well:
- Significantly lower fire risk. There is no exposed high-wattage bulb, no hanging fixture, and no open flame potential. The plate surface is warm, not hot.
- Mimics natural brooding behavior. Chicks instinctively seek the warmth of the plate’s underside and leave when they are warm enough. This more closely replicates how a broody hen keeps chicks warm and is associated with better stress outcomes in chick development according to poultry researchers.
- No light disruption. Heat plates produce no visible light, allowing normal day/night cycles in the brooder.
- Energy efficient. Most heat plates draw between 12 and 42 watts, depending on size, which is a fraction of a 250W heat lamp. Smaller plates like the Hatching Time 10×10 run at the lower end of that range; larger plates like the 16×16 draw around 42W.
- Less temperature monitoring required. The plate surface maintains a consistent temperature regardless of ambient conditions.
Potential Drawbacks:
- Higher upfront cost. A quality heat plate runs $50 to $90 depending on size and brand, significantly more than a basic heat lamp setup.
- Limited flock size per unit. Each plate has a maximum capacity based on its surface area. A 10×10 inch plate handles around 20 chicks. A 16×16 handles around 35. Large batches of chicks may require multiple plates.
- Less effective in very cold environments. In an unheated barn in deep winter, a heat plate alone may not maintain adequate brooder temperatures if ambient temperature drops significantly. In those conditions, supplemental heat may be needed.
- Chicks must learn to use it. Most do instinctively, but occasionally a chick will not seek the plate on its own and needs to be manually placed under it.
Recommended heat plates:
Hatching Time 10×10 Comfort Heating Plate for up to 20 chicks
Hatching Time 16×16 Comfort Heating Plate for up to 35 chicks
Both are adjustable in height to accommodate chicks from day one through the brooding period. The surface temperature is calibrated to simulate natural brooding conditions. Hatching Time’s heat plates are purpose-built for poultry brooding rather than repurposed reptile or pet heating equipment.
Which One Should You Choose?
Choose a heat lamp if:
- You are starting out and cost is the primary consideration
- You are brooding a large batch of chicks that exceeds a heat plate’s capacity
- Your brooder setup is large and open, where radiant overhead heat is more practical
- You already own the fixture and bulbs
- You are brooding mail-order chicks that have been shipped. The ambient warmth from a heat lamp encourages eating and drinking after the stress of transit, which matters in the first 24 to 48 hours
Choose a heat plate if:
- Fire safety is a priority, especially if your brooder is in a barn or coop with dry bedding and combustibles nearby
- You want lower ongoing electricity costs over a six-week brooding period
- You prefer a set-it-and-leave-it approach with less temperature monitoring
- You are brooding chicks in a home setting where light disruption matters
Both options work. Experienced chicken keepers use both successfully. The heat plate has advantages that are hard to argue with on safety and energy use, and the upfront cost difference narrows when you factor in electricity over a full brooding period. The heat lamp remains a legitimate choice for anyone working with a tight budget or a large flock.
One Practical Note
Whichever option you choose, have a thermometer in the brooder and check the temperature at chick level during the first 24 hours. Do not assume the setup is correct because the equipment is running. Confirm the actual temperature before chicks arrive. A digital probe thermometer on the brooder floor is a small investment that removes a significant variable from your first brooding experience.
For a full walkthrough of everything involved in starting your first flock, including brooder setup, breed selection, and what to expect in year one, see our Getting Started with Backyard Chickens guide.
Links may be added or updated over time. They do not affect how products are selected or discussed.
Affiliate Disclosure This article may contain affiliate links. If you buy through one of those links, Working Acre may earn a small commission at no extra cost to you. Product mentions are based on usefulness, fit, and relevance to the topic.